Retrieve Sensor Details - Tutorial
In this tutorial, we will explain, step-by-step, how to retrieve details about the sensors in your organization.
You must have the System Admin role added for your Cybereason user to perform these commands.
When managing your organization’s sensors, it can be useful to retrieve all sensor information in a single list for all sensors. You can use the API to retrieve a list of all sensors or a filtered list of sensors (for example, all Windows sensors).
You can then analyze the details in the response to manage other sensor settings.
In this topic:
Build the request
Note
The request body is the same regardless of how you run the request (such as a cURL command, in a REST API client, or Python script).
Ensure you log in to the Cybereason platform with the API. For details, see Log in with the API.
In your REST API client, open a new tab/file.
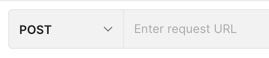
In the relevant field, enter the URL for the request:
https://<your server address>/rest/sensors/query
For example, in Postman, you enter the URL here:

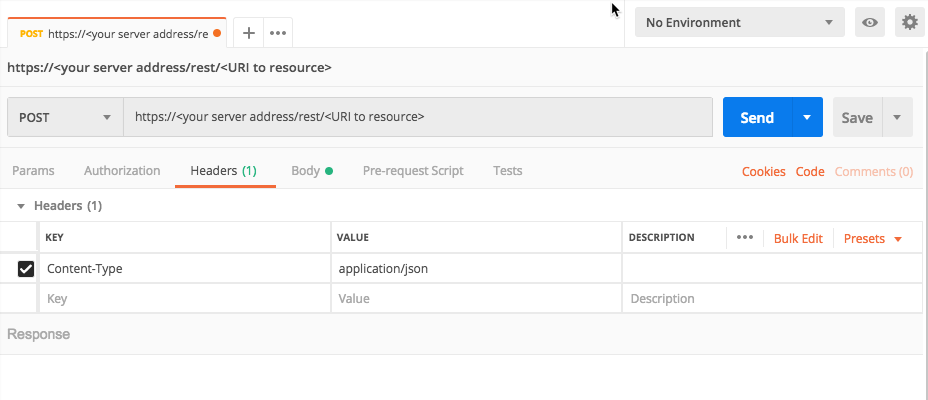
Ensure that the method for the request is set to POST. (This may be the default for your REST API client, but if not, ensure that you select it.)
For the Headers, for the Key column, add a Content-Type header.
In the Value column, add the value application/json.
For example, in Postman, your header will look like this:
Navigate to the section to add your request body. In Postman, for example, this is the Body tab.
In the Body tab, ensure that you have set your client editor to enable you to add raw JSON content. In Postman, for example, ensure that Raw is selected.
In the request body edit area, enter an open and closed bracket {}. This is the standard syntax for JSON.
You are now ready to begin adding the object and key/value pairs that build the request body.
Inside the brackets, add this template request body:
{
        "limit": "<limit value>",
        "offset": "<offset value>",
        "sortDirection": "<direction>",
        "filters": [
          "<filter>"
        ]
      }
You will fill in this request part by part in the next section.
Retrieve details on all sensors
This section updates the template request body to retrieve details on all sensors.
You must update the value for each key to send the request.
In the request body, find the limit key.
In the limit key, update the limit value placeholder value to 10000. Make sure you remove the quotes around the placeholder value, as integer/number values in JSON do not require quotes.
If you are using this tutorial to retrieve sensor details from your production environment, you may need to update this value for the actual number of sensors.
{
        "limit": "**10000**",
        "offset": "<offset value>",
        "filters": [
          "<filter>"
        ]
      }
In the offset key, update the offset value placeholder value to 0. Make sure you remove the quotes around the placeholder value as you did for the limit key value.
This value is used for pagination, so unless you have a specific reason not to start at the first value, you should use the default 0 value.
{
        "limit": "10000",
        "offset": "**0**",
        "filters": [
          "<filter>"
        ]
      }
For the example in this section, remove the filters object. Since you are retrieving all sensors, and not filtering the list, this object is not necessary.
In addition, after the “offset:0” key value pair, remove the comman to ensure correct JSON syntax.
{
        "limit": "<limit value>",
        "offset": "<offset value>"
      }
In your client machine, run your request.
Your API client will display a list of sensors, with multiple lists of items for each sensor. We will review the response fields in the section below.
Filter the list of sensors
In the previous section, you built the request to retrieve the full, unfiltered list of sensors. In this section, you extend this request body to filter the list.
In your client, in the request body area, add the filters object back into the request body (since you deleted it in the previous section).
{
        "limit": "10000",
        "offset": "0",
        "filters": [
          "<filter>"
        ]
      }
In the filters object, add the filter template:
{
        "limit": "10000",
        "offset": "0",
        "filters": [
          {
                      "fieldName":"<filter field>",
                      "operator":"<operator>",
                      "values": [
                                  "<value 1>","<value 2>"
                                ]
                  }
        ]
      }
For this example, you update the list of sensors to only display online sensors. In the filters object, for the fieldName key, update the filter field placeholder value to status.
{
        "limit": "10000",
        "offset": "0",
        "filters": [
          {
                      "fieldName":"**status**",
                      "operator":"<operator>",
                      "values": [
                                  "<value 1>","<value 2>"
                                ]
                  }
        ]
      }
For each value, you must also add an operator. Since the status8* field is an enum, you must add an operator for an enum. For the **operator key, for the operator placeholder value, update the value to Equals.
{
        "limit": "10000",
        "offset": "0",
        "filters": [
          {
                      "fieldName":"status",
                      "operator":"**Equals**",
                      "values": [
                                  "<value 1>","<value 2>"
                                ]
                  }
        ]
      }
The last key value pair you must update for the filters object in the request body is the value or values by which to filter. For the status field, there are multiple possible values. However, for this example, you filter for online sensors.
In the filters object, for the values array, update the value 1 placeholder value with Online. You can remove the value 2 placeholder value and comman character after the value 1 placeholder.
{
        "limit": "10000",
        "offset": "0",
        "filters": [
          {
                      "fieldName":"status",
                      "operator":"Equals",
                      "values": [
                                 "**Online**"
                                ]
                  }
        ]
      }
In your client machine, run your request.
Review the sensor details in the request
When your Cybereason platform returns the response with a list of sensors and sensor details, the response contains multiple lines.
Note
This sample response contains only one sensor section and its corresponding details. The response you receive will likely be much longer than the sample below.
{
 "sensors": [
     {
         "sensorId": "5ad31a2ce4b0e623bab9b9ae:PYLUMCLIENT_DEMO_DEMO1WIN7X64_005056AAA5F2",
         "pylumId": "PYLUMCLIENT_DEMO_DEMO1WIN7X64_005056AAA5F2",
         "guid": "-1869914237.1198775089551518743",
         "fqdn": "demo1win7x64",
         "machineName": "DEMO1WIN7X64",
         "internalIpAddress": "1.1.1.1",
         "externalIpAddress": "11.1.11.11",
         "siteName": null,
         "siteId": null,
         "ransomwareStatus": "DISABLED",
         "preventionStatus": "NOT_INSTALLED",
         "isolated": false,
         "disconnectionTime": 1523872923530,
         "lastPylumInfoMsgUpdateTime": 1523873136274,
         "status": "Online",
         "onlineTimeMS": 1523872959216,
         "offlineTimeMS": 1523872924216,
         "staleTimeMS": 0,
         "archiveTimeMs": 0,
         "statusTimeMS": 1523872959216,
         "lastStatusAction": "None",
         "archivedOrUnarchiveComment": "",
         "sensorArchivedByUser": "",
         "serverName": "12.34.56.78",
         "serverId": "5ad31a2ce4b0e623bab9b9ae",
         "osType": "WINDOWS",
         "osVersionType": "Windows_7",
         "collectionStatus": "ENABLED",
         "version": "17.6.10.0",
         "firstSeenTime": 1523872390812,
         "upTime": 184928,
         "cpuUsage": 0.016614608,
         "memoryUsage": 47464448,
         "outdated": false,
         "amStatus": "AM_UNINSTALLED",
         "powerShellStatus": "PS_DISABLED",
         "antiMalwareStatus": "AM_DISABLED",
         "organization": "demo",
         "proxyAddress": null,
         "preventionError": null,
         "exitReason": "STOP_REQUEST_FROM_PYLUM",
         "actionsInProgress": 0,
         "pendingActions": null,
         "lastUpgradeResult": null,
         "lastUpgradeSteps": null,
         "disconnected": false,
         "sensorLastUpdate": 1523873139215,
         "fullScanStatus": "UNKNOWN",
         "quickScanStatus": "UNKNOWN",
         "lastFullScheduleScanSuccessTime": 0,
         "lastQuickScheduleScanSuccessTime": 0
     }
 ],
 "totalResults": 1,
 "hasMoreResults": false,
 "sensorsStatus": {
     "onlineCount": 1,
     "offlineCount": 0,
     "staleCount": 0,
     "archivedCount": 0
 }
}
In the response, you start your analysis in specific areas:
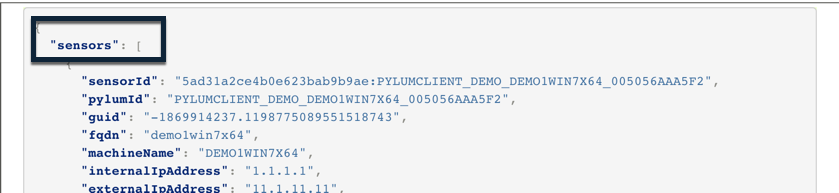
The sensors object contains separate objects for each individual sensor. Start your analysis there to know where to begin searching for sensor IDs.
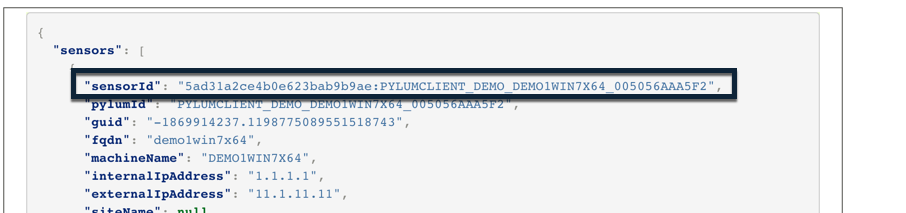
sensorId key: This key contains the sensor ID for each sensor in the list.
Below the sensorId key, there are other lines for metadata for each sensor. Read through the lines to understand the full status for each individual sensor. Some of the more useful keys include:
status
ransomwareStatus
preventionStatus
osVersionType
collectionStatus
version
amStatus
powerShellStatus
antiMalwareStatus
For a full list of all the fields, see the Response Success Schema section in the Query Sensors API reference topic.
Next steps
Now that you understand how to build a request to retrieve all sensor details or a filtered list of sensor details, you are ready to build your own scripts or requests to use as part of your own workflow.