Add a Custom Reputation in Private Threat Intelligence
In this tutorial, we will explain, step-by-step, how to update an item’s reputation in your private threat intelligence.
For this tutorial, you will update your private threat intelligence by adding a file hash value, an IP address, and a domain name.
In this topic:
What are custom reputations?
For each Cybereason environment, you can specify a custom “reputation” for items such as file hashes, IP addresses, and domain names. The reputation you set in your private threat intelligence overrides the reputation classification in Cybereason’s global threat intelligence.
You can use your private threat intelligence to customize your Cybereason environment for your specific situation. For example, if the platform normally classifies a certain IP address as malicious, but you know the address is legitimate for your organization, you can add this IP address to the allowlist.
To specify a custom reputation, you add the key for the item and specify whether the item is on the allowlist (meaning the item is legitimate or benign) or the blocklist. For file hashes, you can also instruct the Cybereason platform to prevent the file hash from executing on endpoint machines.
Build the request
Before you begin, ensure you know the file hash values, IP addresses, and domain names which you would like to update.
Note
This request body is the same regardless of how you run the request (such as in a cURL command, in a REST API client, or in a script such as a Python script)
Ensure you log in to the Cybereason platform with the API. For details, see Log in with the API.
In your REST API client, open a new tab/file.
In the relevant field, enter the URL for the request:
https://<your server address>/rest/classification/update
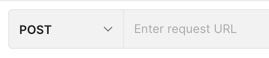
For example, in Postman, you enter the URL here:

Ensure that the method for the request is set to POST. (This may be the default for your REST API client.)
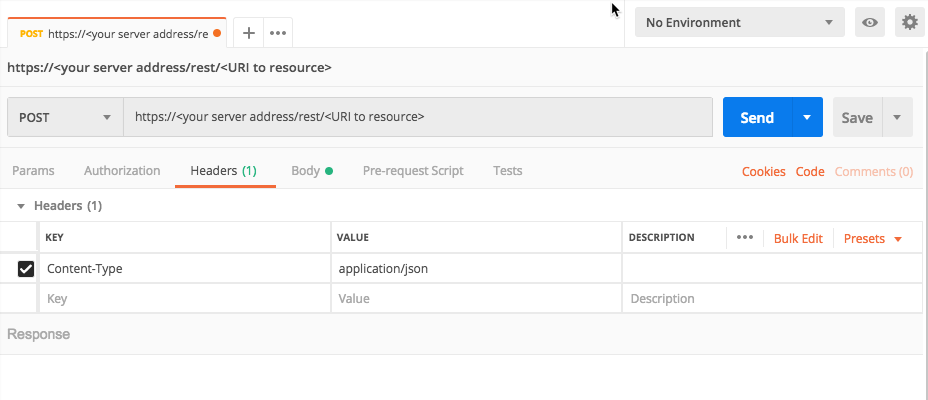
For the Headers, for the Key columm, add a Content-Type header.
In the Value field, add the value application/json.
For example, in Postman, your header will look like this:
Navigate to the section to add your request body. In Postmank, this is found in the Body tab.
In the Body tab, ensuere that you have set your client editor to enable you to add raw JSON content. In Postman, ensure that Raw is selected.
In the request body edit area, enter the following characters, each on its own line:
[
{
"key": "value"
}
]
This is the standard syntax for JSON.
You are now ready to add the objects and key value pairs that build the request boyd.
In the curly brace, add this request body template:
{
"keys":["<key>"],
"maliciousType":"<reputation>",
"prevent":true,
"remove":true
}
You will fill in this request part by part in the next section.
Update the individual reputations
The following example adds a file hash to the allowlist and blocks the file from executing.
You must update the value for each key to send the request.
In the request body template, find the keys object.
Inside the keys object, find the key placeholder value.
Replace the key placeholder value with 0aae5873aa0e9f80d3fa41524bef6825723b9e87 (a fictitious file hash value).
{
   "keys":["**0aae5873aa0e9f80d3fa41524bef6825723b9e87**"],
   "maliciousType":"<reputation>",
   "prevent":true,
   "remove":true
}
To classify this file hash as benign, add the key to the allowlist. To do this, locate the maliciousType key, and replace the reputation placeholder with whitelist.
{
   "keys":["0aae5873aa0e9f80d3fa41524bef6825723b9e87"],
   "maliciousType":"**whitelist**",
   "prevent":true,
   "remove":true
}
To block the execution of a file that has thi has, locate the prevent key, and leave the true placeholder value as true. (This key is a boolean type, so you either enter true to block the file or false to allow the file execution.)
{
   "keys":["0aae5873aa0e9f80d3fa41524bef6825723b9e87"],
   "maliciousType":"whitelist",
   "prevent":true,
   "remove":true
}
To add or update the existing value for this file has in the Cybereason platform, locate the remove key, and then replace the true placeholder with false.
{
   "keys":["0aae5873aa0e9f80d3fa41524bef6825723b9e87"],
   "maliciousType":"whitelist",
   "prevent":true,
   "remove":false
}
Add additional keys
You can also use the API to add multiple reputation values in a single request. The following example adds an IP address to the blocklist and adds a domain name to the allowlist.
Inside the square backets, after the closing curly brace for the JSON you entered in the previous section, add a comma (,).
{
   "keys":["0aae5873aa0e9f80d3fa41524bef6825723b9e87"],
   "maliciousType":"whitelist",
   "prevent":true,
   "remove":false
}
In the line below the comma, add the template syntax you entered in the previous section:
{
   "keys":["0aae5873aa0e9f80d3fa41524bef6825723b9e87"],
   "maliciousType":"whitelist",
   "prevent":true,
   "remove":false
},
{
   "keys":["<key>"],
   "maliciousType":"<reputation>",
   "prevent":true,
   "remove":true
}
In the second keys object, replace the key placeholder value with 12.34.56.78 (a fictitious IP address).
{
   "keys":["0aae5873aa0e9f80d3fa41524bef6825723b9e87"],
   "maliciousType":"whitelist",
   "prevent":true,
   "remove":false
},
{
   "keys":["**12.34.56.78**"],
   "maliciousType":"<reputation>",
   "prevent":true,
   "remove":true
}
To add this IP address to the blocklist, locate the maliciousType key, and then replace the reputation placeholder with blacklist.
{
   "keys":["0aae5873aa0e9f80d3fa41524bef6825723b9e87"],
   "maliciousType":"whitelist",
   "prevent":true,
   "remove":true
},
{
   "keys":["12.34.56.78"],
   "maliciousType":"**blacklist**",
   "prevent":true,
   "remove":true
}
Because stopping execution is not supported for IP addresses, locate the prevent key, and then replace the true placeholder with false.
{
   "keys":["0aae5873aa0e9f80d3fa41524bef6825723b9e87"],
   "maliciousType":"whitelist",
   "prevent":true,
   "remove":false
},
{
   "keys":["12.34.56.78"],
   "maliciousType":"blacklist",
   "prevent":false,
   "remove":true
}
To update this item in the Cybereason platform, locate the remove key and replace the true placeholder value with false.
{
   "keys":["0aae5873aa0e9f80d3fa41524bef6825723b9e87"],
   "maliciousType":"whitelist",
   "prevent":true,
   "remove":false
},
{
   "keys":["12.34.56.78"],
   "maliciousType":"blacklist",
   "prevent":false,
   "remove":false
}
Repeat steps 1-6 to add a domain name to the allowlist.
Use these values:
Key
Value
keys
mydomain.com
maliciousType
whitelist
prevent
false
remove
false
After you add the domain name information, your full request body looks like this:
{
   "keys":["0aae5873aa0e9f80d3fa41524bef6825723b9e87"],
   "maliciousType":"whitelist",
   "prevent":true,
   "remove":false
},
{
   "keys":["12.34.56.78"],
   "maliciousType":"blacklist",
   "prevent":false,
   "remove":false
},
{
   "keys":["mydomain.com"],
   "maliciousType":"whitelist",
   "prevent":false,
   "remove":false
}
In your client machine, run your request.
Verify the update
After you run the request, the response contains the following simple message, which provides details on the update:
{
   "outcome":"success","data":true
}
You can also retrieve a full list of all reputations for your environment and check the individual items in that list. For details on how to retrieve the full list, see Set Reputation.
Next steps
Now that you understand how to update an item’s reputation, you can use this API request as part of automating your security operations.