Log in with the API with TFA
Before you send requests with the API to your server, you must log in. If you have two-factor authentication (TFA) enabled for your user account, you can still use the API.
To use TFA with the API, you have different steps depending on whether it is the first time you are logging in to the platform using TFA and subsequent times with TFA.
Occurence |
Steps |
|---|---|
First time login with TFA |
Note Ensure you retrieve the TFA key from the initial login response as the TFA key is not included in subsequent login requests. If you do not retrieve this key on the first request, but TFA is enabled for your user, you will be locked out of your account and a user admin must reset your TFA key.
|
Subsequent login |
|
Note
Ensure you are using the TLS 1.2 security protocol on your machine before sending an authentication request.
When you send a request to log in, your Cybereason server returns a session cookie, which is stored on your machine. You can then reference the cookie in subsequent requests.
All cookies are valid for an 8 hour period.
The cookie uses the format of a JSESSIONID:
JESSIONID: 6540146A88QP0F1F82537012D9C565AC
For details on password requirements for the Cybereason platform when sending an authentication request, see Select the password complexity.
In this topic:
Send an authentication request
Follow the steps to log in (depending on the framework you use). You send this request every time you login.
cURL
When you log in with cURL, you have the option of providing your credentials in a separate file or including the credentials in the command.
In a command window, enter one of the following commands:
If you add your credentials in a separate file:
curl -X POST https://[hostname]:[port]/login.html -d @authentication.txt --header "Content-Type:application/x-www-form-urlencoded" -c cookie.txt
In the separate file (login.txt in this example) add your credentials in the format username=<username>&password=<my password>. The username parameter uses the %40 encoding in place of the @ character.
For example, you can use this for authentication: username=admin%40myserver.com&password=3GYvP9ADQWak.
If you enter your credentials directly in the command:
curl -X POST https://[hostname]:[port]/login.html -d "username=<username>&password=<my password>" --header "Content-Type:application/x-www-form-urlencoded" -c cookie.txt
In this command:
The [hostname]:[port] parameter is the address to your Cybereason server.
The username parameter uses the %40 encoding in place of the @ character.
The cookie.txt contains the authentication cookie for access. Your machine stores the cookie in the root folder where you opened the command window.
REST API Client
- In your client, create a new request for authentication and save it with a descriptive name.
Set the request method to POST.
Enter the URL for your server in the format
https://[hostname]:[port]/login.html.Set the header value to Content-Type with the value application/x-www-form-urlencoded.
In the request body, create a key for username and password. Enter your username and password as the values for these keys.
Send the request in your client.
Cybereason returns a cookie stored in your client for the rest of your session.
Python
Ensure that Python version 2.7 or higher is installed on your system.
Install the requests library using this command:
pip install requests
Create your own Python script with this content:
import requests

username = "<your user name>"
password = "<password>"
server = "<server URL>"
port = "443"

data = {
    "username": username,
    "password": password
}
headers = {"Content-Type": "application/x-www-form-urlencoded"}

base_url = "https://" + server + ":" + port
login_url = base_url + "/login.html"

session = requests.session()
response = session.post(login_url, data=data, headers=headers, verify=True)

print (response.status_code)
print (session.cookies.items())
The variables in this script include:
Variable |
Type |
Description |
|---|---|---|
server |
String |
The base URL for your server. Enter the URL without the https:// prefix. |
username |
String |
Your Cybereason user name. |
password |
String |
The password for your Cybereason user name. |
port |
Integer |
The port used for your Cybereason server. |
Note
The final two print lines in the above script are not required for authentication but confirm that you have been authenticated successfully.
Authentication text syntax file
Depending on your browser settings, this linked file may open in a separate tab instead of downloading directly to your machine. If this happens, use the Save As option in your browser to save the file locally.
Retrieve the TFA key from the initial login response
Note
This section is required the first time you login after TFA is enabled for your account.
When you set up TFA for your user account in an authentication program or app, you must provide a unique identifier key for your email account.
Note
Ensure you retrieve the TFA key from the initial login response as the TFA key is not included in subsequent login requests. If you do not retrieve this key on the first request, but TFA is enabled for your user, you will be locked out of your account and a user admin must reset your TFA key.
To retrieve the key, follow these steps:
In the response for the initial login request, locate the sid-number section:
  <div class="sid-number">
           <span>XZYH</span>
           <span style="width: 10px;"></span>
           <span>Z6UI</span>
           <span style="width: 10px;"></span>
           <span>HG3V</span>
           <span style="width: 10px;"></span>
           <span>X6M6</span>
  </div>

.. note:: After the first login request, the **sid-number** section is not part of the standard login response body.
From the sid-number section, combine the key parts between each span tag.
In the example above, the full key would be XZYHZ6UIHG3VX6M6.
This key is the key you use in your authentication utility or app for the email address associated with the Responder L2 user.
Set up two-factor authentication codes
Note
This section is required the first time you login after TFA is enabled for your account.
Cybereason supports TFA for user accounts using Time-based One Time Password (TOTP) applications. Cybereason TFA supports TOTP applications that support RFC 4226.
Add the key built from the initial login request to your authentication utility or app to enable the TOTP passwords.
Send the TFA code authentication request
Follow the steps to perform TFA on all login requests with the API (depending on the framework you use). You must send this request each time AFTER you send the initial login request in the section above.
This request is used for the first login and subsequent logins.
cURL
In a command window, enter this command:
curl -X POST https://[hostname]:[port] --header "Content-Type:application/x-www-form-urlencoded" --data-urlencode 'totpCode=<one time password>' --data-urlencode 'submit=Login'
For the totpCode string, enter the code from your authentication utility or program.
REST API Client
In your client, create a new request for authentication and save it with a descriptive name.
Set the request method to POST.
Enter the URL for your server in the format
https://[hostname]:[port]/.Set the header value to Content-Type with the value application/x-www-form-urlencoded.
In the request body, create a key for totpCode and Submit.
Enter your one-time password for the totpCode.
Set the value of the Submit key to Login.
Send the request in your client.
Cybereason returns a cookie stored in your client for the rest of your session.
Python
Create your own Python script with this content:
import requests

url = "<your server address>/"

payload='totpCode=<one time password>&submit=Login'

headers = {'Content-Type': 'application/x-www-form-urlencoded'}

response = sessions.request("POST", url, headers=headers, data=payload)

print response.status_code
print(response.text)
Note
The final two print lines in the above script are not required for authentication but confirm that your request has been processed correctly.
Use the cookie in other requests
Depending on how you send a request, you specify the cookie differently.
cURL
Because cURL requests return the cookie in a file, you specify the cookie file as part of the command:
curl -X POST https://[hostname]:[port]/login.html -d @login.txt --header "ContentType:application/x-www-form-urlencoded" -c cookie.txt
REST API Client
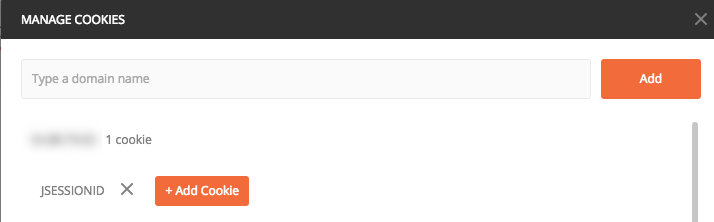
When you use a REST API client, the cookie is often returned as part of the response and displayed in a separate tab. For example, in the Postman API client, you can find the cookie details in the response:

Then, you can reference the cookie in each request if needed. For example, in Postman, you can select from any of the saved cookies:
However, this may not be necessary as your API client may store the cookie until it expires.
Python
As part of the Python authentication script, you specify details on the URL and credentials to use. In addition, you create a session object that returns the details on the session.
You can include this authentication code at the top of each request script, and the cookie is automatically applied to the request.
At the end of the Python code for authentication there is code to create a session object that contains the cookie:
session = requests.session()
response = session.post(login_url, data=data, verify=True)

print response.status_code
print session.cookies.items()
Then later in the Python script, the code for the request, you reference the session object. This example is taken from our reference examples where we create a special variable to hold the response data:
response = session.request("POST", url, data=<variable>, headers=headers)
This ensures you use the current session cookie.
Log out from your machine
If you want, you can also logout from the machine. Follow the steps to log out (depending on the framework you use):
cURL
In a command window, enter one of the following commands:
curl -X GET https://[hostname]:[port]/logout
REST API Client
In your client, create a new request for authentication and save it with a descriptive name.
Set the request method to GET.
Enter the URL for your server in the format
https://[hostname]:[port]/logout.Send the request in your client.
If your request is successful, the Cybereason platform returns an HTTP 200 status code and returns the HTML code for the login page in the response.
Python
Create your own Python script with this content:
import requests

base_url = "https://" + server + ":" + port
logout_url = base_url + "/logout"

session = requests.session()
response = session.get(logout_url, verify=True)

print response.status_code
print(response.content)
Note
The final two lines in the above script arae not required, but confirm that you have logged out of your platform successfully. If your request is successful, the Cybereason platform returns an HTTP 200 status code and returns the HTML code for the login page in the response.
Depending on your browser settings, this linked file may open in a separate tab instead of downloading directly to your machine. If this happens, use the Save As option in your browser to save the file locally.