Add Sensor Tags to a Machine - Tutorial
In this tutorial, we will explain, step-by-setp how to add sensor tags to one or more machines using the API. We will use the scenario of adding general values for each type of sensor tag to an example machine.
This tutorial will explain how to set up the necessary request body using a REST API client, such as Postman. However, you can use other methods to send the request (such as cURL command or Python script).
If you choose to use these steps in your own environment, you should substitute real machine names from your own environment in place of the example machine names in this tutorial.
In this topic:
What are sensor tags?
Sensor tags enable you to add “labels” to sensor to help you organize those sensors in a meaningful way. After you add sensor tags to any sensor, you are able to to search for sensors based on a specific tag and update settings for those sensors in a much more efficient and organized manner.
The Cybereason platform contains four pre-defined tags:
Department
Location
Device Type
Critical Asset
In addition, you can a Custom tag with any value you like.
When you create or update sensor tags in the Cybereason UI in the System > Sensors screen, you use a CSV file (which you must download, update, and upload again) to create the values. Using the API to update sensor tags may enable you to update tags in more efficient and automatic manner.
Follow the steps in the sections below to create sensor tags with the API.
Find the machine name
As part of the request body to create a sensor tag, you must have the machine name or fully qualified name (FQDN) for each machine that requires sensor tags.
Retrieve a list of sensors and sensor details with the API. For details on how to retrieve these details, see Create Sensor Tags.
Look at the machine details in your operating system.
When you find the machine name or FQDN for the machine, you should see a value such as this:

Prepare the request to add sensor tags
Once you have the machine name or FQDN, you are ready to create the request body.
Note
The request body is the same regardless of how you run the request (such as a cURL command, in a REST API client, or Python script).
Ensure you log in to the Cybereason platform with the API. For details, see Log in with the API.
In your REST API client, open a new tab or file.
In the relevant field, enter the URL for the request:
https://<your server address>/rest/tagging/process_tags
For example, in Postman, you enter the URL here:

Ensure that the method for the request is set to POST. (This may be the default method for your REST API client, but if not, ensure you select this method.)

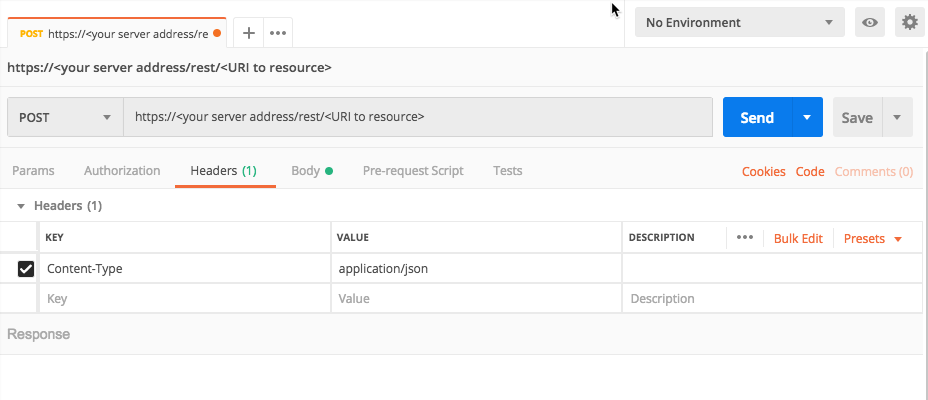
For the Headers, in the Key column, add a Content-Type header.
For the Value, add the value application/json.
For example, in Postman, your header will look like this:
Navigate to the section to add your request body.
In the Body tab, ensure that you have set your client editor to enable you to add raw JSON content.
In the request body edit area, enter an open and closed bracket ({}). This is the standard start and end of a JSON request body.
You are now ready to begin adding the objects and key/value pairs that build the request body.
Inside the brakcets, add this template request body.
Note
This example includes the start and end brackets. Ensure you only copy the content between these brackets if you already added the brackets in your JSON code.
{
  "entities": {
         "<machine identifier>": {
           "tags": {
             "<tag type>": {
               "value": "<value>",
               "operation": "SET"
             },
              "<tag type>": {
                                    "value": "<value>",
                                    "operation": "SET"
                                  },
              "<tag type>": {
                                    "value": "<value>",
                                    "operation": "SET"
                                  },
              "<tag type>": {
                                    "value": "<value>",
                                    "operation": "SET"
                                  }
                                },
                                "entityType": "MACHINE"
                              }
                            }
}
You will fill in this request body part by part in the next section.
In this template requesdt body, there are a number of fields you do not need to update, since these objects contain the key/value pairs. The fields you do not need to update include:
entities object: This object contains a listing of all the machines for which you need to create sensor tags.
tags object: This object contains the list of tags for the specific machine. Each machine will contain its own tags object with the unique sensor tags for that machine.
Update the tags in the request body
You wil need to update the sensor tags for each machine to send the request.
In the request body template, find the <machine identifier> key. In the template, this field uses a placeholder value to remind you to update the machine name.
Add the machine name or FQDN for the machine inside the quotes.
In this example, we use a fictitious machine name mock_4geNz66cpecC1eF2J.
{
  "entities": {
         "**mock_4geNz66cpecC1eF2J**": {
           "tags": {
             "<tag type>": {
               "value": "<value>",
               "operation": "SET"
             },
              "<tag type>": {
                                    "value": "<value>",
                                    "operation": "SET"
                                  },
              "<tag type>": {
                                    "value": "<value>",
                                    "operation": "SET"
                                  },
              "<tag type>": {
                                    "value": "<value>",
                                    "operation": "SET"
                                  }
                                },
                                "entityType": "MACHINE"
                              }
                            }
 }
Now you must add the individual tags for the machine.
There are at least four tags you must provide for each machine in the tags object:
DEPARTMENT
LOCATION
DEVICE TYPE
CRITICAL ASSET
You can also add a CUSTOM_TAGS object but this is not required. We will not add a CUSTOM_TAGS object for this example.
Inside the tags object, add the DEPARTMENT tag:
{
  "entities": {
         "mock_4geNz66cpecC1eF2J": {
           "tags": {
             "**DEPARTMENT**": {
               "value": "<value>",
               "operation": "SET"
             },
              "<tag type>": {
                                    "value": "<value>",
                                    "operation": "SET"
                                  },
              "<tag type>": {
                                    "value": "<value>",
                                    "operation": "SET"
                                  },
              "<tag type>": {
                                    "value": "<value>",
                                    "operation": "SET"
                                  }
                                },
                                "entityType": "MACHINE"
                              }
                            }
}
For each tag, you must also specify a value for the tag and operation.
In the DEPARTMENT tag object, you provide a string for the value key. In this example, you will add HR for the value key:
{
  "entities": {
         "mock_4geNz66cpecC1eF2J": {
           "tags": {
             "DEPARTMENT": {
               "value": "**HR**",
               "operation": "SET"
             },
              "<tag type>": {
                                    "value": "<value>",
                                    "operation": "SET"
                                  },
              "<tag type>": {
                                    "value": "<value>",
                                    "operation": "SET"
                                  },
              "<tag type>": {
                                    "value": "<value>",
                                    "operation": "SET"
                                  }
                                },
                                "entityType": "MACHINE"
                              }
                            }
}
In addition, you must provide the operation to perform for the sensor tag. Because you are creating the key, you must set the value of the operation key to SET.
Note
If the sensor tag already exists, the Cybereason platfrom would update the existing vaelu with this method. If you later need to delete this tag, you would change the value of the operation key to REMOVE.
Below the DEPARTMNET tag object, in place of the placeholder value <tag type, change the value to LOCATION:
{
  "entities": {
         "mock_4geNz66cpecC1eF2J": {
           "tags": {
             "DEPARTMENT": {
               "value": "HR",
               "operation": "SET"
             },
              "**LOCATION**": {
                                    "value": "<value>",
                                    "operation": "SET"
                                  },
              "<tag type>": {
                                    "value": "<value>",
                                    "operation": "SET"
                                  },
              "<tag type>": {
                                    "value": "<value>",
                                    "operation": "SET"
                                  }
                                },
                                "entityType": "MACHINE"
                              }
                            }
}
In the LOCATION tag object, set the value key to USA and leave the value of the operation key to SET:
{
  "entities": {
         "mock_4geNz66cpecC1eF2J": {
           "tags": {
             "DEPARTMENT": {
               "value": "HR",
               "operation": "SET"
             },
              "LOCATION": {
                                    "value": "**USA**",
                                    "operation": "SET"
                                  },
              "<tag type>": {
                                    "value": "<value>",
                                    "operation": "SET"
                                  },
              "<tag type>": {
                                    "value": "<value>",
                                    "operation": "SET"
                                  }
                                },
                                "entityType": "MACHINE"
                              }
                            }
}
Below the LOCATION tag object, in place of the placeholder value <tag type>, change the value to DEVICE TYPE.
For the DEVICE TYPE tag, you add a string value to describe the device. In this tutorial, set the value to WINDOWS and leave the value for the operation key to SET.
{
  "entities": {
         "mock_4geNz66cpecC1eF2J": {
           "tags": {
             "DEPARTMENT": {
               "value": "HR",
               "operation": "SET"
             },
              "LOCATION": {
                                    "value": "USA",
                                    "operation": "SET"
                                  },
              "**DEVICE TYPE**": {
                                    "value": "**WINDOWS**",
                                    "operation": "SET"
                                  },
              "<tag type>": {
                                    "value": "<value>",
                                    "operation": "SET"
                                  }
                                },
                                "entityType": "MACHINE"
                              }
                            }
}
Below the LOCATION tag object, in place of the placeholder value <tag type>, change the value to CRITICAL ASSET.
For the CRITICAL ASSET tag, you add a boolean value to indicate whether this is an important machine.
For the value key, add true and leave the value for the operation key to SET.
{
  "entities": {
         "mock_4geNz66cpecC1eF2J": {
           "tags": {
             "DEPARTMENT": {
               "value": "HR",
               "operation": "SET"
             },
              "LOCATION": {
                                    "value": "USA",
                                    "operation": "SET"
                                  },
              "DEVICE TYPE": {
                                    "value": "WINDOWS",
                                    "operation": "SET"
                                  },
              "**CRITICAL ASSET**": {
                                    "value": "**true**",
                                    "operation": "SET"
                                  }
                                },
                                "entityType": "MACHINE"
                              }
                            }
}
In your client, run the request.
Verify the tag update
After you run the request, you should receive a respnse indicating the successful creation of the sensor tags.
In this request, you will see a number of fields, many of which are similar to the request body:
"entities": {
 "<Machine name>": {
   "results": {
     "Department": {
       "oldValue": "<former value>",
       "newValue": "<new value>",
       "operation": "SET",
       "success": true,
       "failReason": ""
In this response, you want to look inside the machine name object at the values for each tag:
In the machine object (represented in the template response above with the placeholder <machine name> key), find the Department tag object.
Inside the Department tag, look at the values for the oldValue key and newValue key. The oldValue key will display the former value for the tag (if one existed), and the value you updated.
Ensure the success key displays a value of true. If it reports false, view the value of the failReason* key to understand the failure.
View the keys inside the other tag objects (LOCATION, DEVICE TYPE, and CRITICAL ASSET) to see the update.
Next steps
Now that you understand how to update sensor tags with the API, you can begin preparing scripts or requests to automate this process for your organization.