Find Sensors on Machines with a Specific OS
When you manage Sensors, it is often important to know the type of operating system on the Sensor’s machine. The Sensor API provides the ability to return a list of all Sensors for a specific operating system.
In this topic:
Step 1: Plan your updates
Before you begin, ask yourself which operating systems you would like to find. This value is used in the filters parameter of the request to return sensors that match the filter.
Step 2: Construct your API request
In this example, we will filter by machines running Windows operating systems.
To construct the request, you must update the following request body parameters:
The limit parameter. An integer value that instructs the server how many Sensors to include in the response.
The offset parameter. An integer value. Set this value to 0 for this case.
The sortDirection parameter. This enum value tells the Sensor to return the values in ascending ASC or descending DESC order.
The filter parameter. This parameter is an array which can include a number of other fields. In this example, we will use the osType field in the filter object parameter.
Add the information for these parameters and create the relevant cURL command, request body example, or Python script:
All Python examples are formatted for Python version 3.0 and higher, up to the latest Python version. If you are using versions of Python earlier than 3.0, ensure you manually remove parentheses for the print statements in this sample. For example, the print (response.content) statement updates to print response.content.
curl --request POST \
  --url https://myserver.com/rest/sensors/query \
  --header 'Content-Type: application/json' \
  --data '{
            "limit":1000,
            "offset":0, "filters":[{"fieldName":"osType","operator":"Equals","values":["WINDOWS"]}]"
          }'
Depending on your browser settings, this linked file may open in a separate tab instead of downloading directly to your machine. If this happens, use the Save As option in your browser to save the file locally.
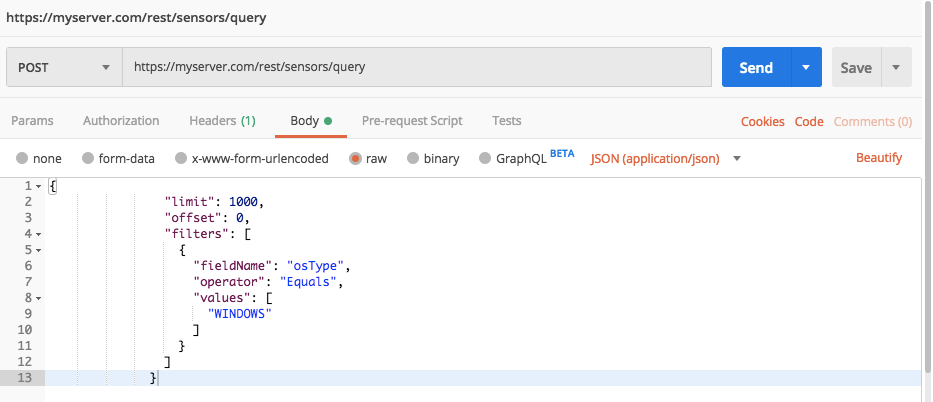
Use this request body:
{
                "limit": 1000,
                "offset": 0,
                "filters": [
                  {
                    "fieldName": "osType",
                    "operator": "Equals",
                    "values": [
                      "WINDOWS"
                    ]
                  }
                ]
              }
Depending on your browser settings, this linked file may open in a separate tab instead of downloading directly to your machine. If this happens, use the Save As option in your browser to save the file locally.
import requests
import json

# Login information

username = "[email protected]"
password = "mypassword"
server = "yourserver.com"
port = "443"

data = {
    "username": username,
    "password": password
}

headers = {"Content-Type": "application/json"}

base_url = "https://" + server + ":" + port

login_url = base_url + "/login.html"

session = requests.session()

login_response = session.post(login_url, data=data, verify=True)

print (login_response.status_code)
print (session.cookies.items())

# Request URL

endpoint_url = "/rest/sensors/query"

api_url = base_url + endpoint_url

# These are the variables that represent different fields in the request.

sensor_filter_1 = "osType"
sensor_filter_1_value = "WINDOWS"
sensor_filter_2 = "cpuUsage"
sensor_filter_2_value = 0.1
sensor_filter_3 = "status"
sensor_filter_3_value = "Online"

query = json.dumps({"limit":1000,"offset":0, "filters":[{"fieldName":sensor_filter_1,"operator":"Equals","values":[sensor_filter_1_value]},{"fieldName":sensor_filter_2,"operator":"GreaterThan","values":[sensor_filter_2_value]},{"fieldName":sensor_filter_3,"operator":"Equals","values":[sensor_filter_3_value]}]})

api_headers = {'Content-Type':'application/json'}

api_response = session.request("POST", api_url, data=query, headers=api_headers)

your_response = json.loads(api_response.content)

print(json.dumps(your_response, indent=4, sort_keys=True))
Step 3: Run your request and generate the response
In the command line, REST API client, or IDE, run the command or script that contains the request. After a few seconds, the Cybereason API returns a response.
Step 4: Evaluate the response
The response returns information for all connected Sensors that meet the filters. View the different properties of relevant Sensors. In addition, the response returns a summary, including the totalResults parameter and sensorsStatus object. These give details on how many Sensors are contained in the response.
Example
In our example, the platform response includes the following fields:
{
  "sensors": [
    {
      "sensorId": "5ad31a2ce4b0e623bab9b9ae:PYLUMCLIENT_DEMO_DEMO1WIN7X64_005056AAA5F2",
      "pylumId": "PYLUMCLIENT_DEMO_DEMO1WIN7X64_005056AAA5F2",
      "guid": "-1869914237.1198775089551518743",
      "fqdn": "demo1win7x64",
      "machineName": "DEMO1WIN7X64",
      "internalIpAddress": "1.1.1.1",
      "externalIpAddress": "11.1.11.11",
      "siteName": null,
      "siteId": null,
      "ransomwareStatus": "DISABLED",
      "preventionStatus": "NOT_INSTALLED",
      "isolated": false,
      "disconnectionTime": 1523872923530,
      "lastPylumInfoMsgUpdateTime": 1523873136274,
      "status": "Online",
      "onlineTimeMS": 1523872959216,
      "offlineTimeMS": 1523872924216,
      "staleTimeMS": 0,
      "archiveTimeMs": 0,
      "statusTimeMS": 1523872959216,
      "lastStatusAction": "None",
      "archivedOrUnarchiveComment": "",
      "sensorArchivedByUser": "",
      "serverName": "123.456.789.012",
      "serverId": "5ad31a2ce4b0e623bab9b9ae",
      "osType": "WINDOWS",
      "osVersionType": "Windows_7",
      "collectionStatus": "ENABLED",
      "version": "17.5.0.0",
      "firstSeenTime": 1523872390812,
      "upTime": 184928,
      "cpuUsage": 0.016614608,
      "memoryUsage": 47464448,
      "outdated": false,
      "amStatus": "AM_UNINSTALLED",
      "powerShellStatus": "PS_DISABLED",
      "antiMalwareStatus": "AM_DISABLED",
      "organization": "demo",
      "proxyAddress": null,
      "preventionError": null,
      "exitReason": "STOP_REQUEST_FROM_PYLUM",
      "actionsInProgress": 0,
      "pendingActions": null,
      "lastUpgradeResult": null,
      "lastUpgradeSteps": null,
      "disconnected": false,
      "sensorLastUpdate": 1523873139215,
      "fullScanStatus": "UNKNOWN",
      "quickScanStatus": "UNKNOWN",
      "lastFullScheduleScanSuccessTime": 0,
      "lastQuickScheduleScanSuccessTime": 0
    }
  ],
  "totalResults": 1040,
  "hasMoreResults": false,
  "sensorsStatus": {
    "onlineCount": 1000,
    "offlineCount": 7,
    "staleCount": 3,
    "archivedCount": 30
  }
}