Download a File from Element Details Screen
Sometimes, in the course of your analysis or hunting, you find a file that you would like to investigate or run in a sandbox environment to see what the file does. In this case, Cybereason allows you to safely download the file using the API and use it in your own environment as needed.
This task takes multiple requests to perform the actual download of the file.
Follow these steps to download a file:
Step 1: Find the GUID for the file to download
Each file is uniquely identified by the Cybereason platform using a GUID. To download these files, you will need to tell the Cybereason platform the GUIDs for the file.
You can find these GUIDs in a number of places:
When you select a file from the list of results in the Investigation screen, the URL bar of your browser window shows the GUID:

Results obtained from the API also contain a separate object organized by the GUID assigned to the file:
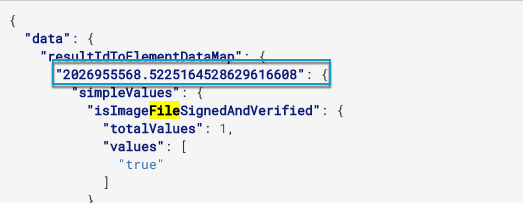
Note this GUID number to use in the request to start the download.
Step 2: Build the request to start the download
The first step to download the file is to build a request to start the download process. As part of this request, you must specify the GUIDs of the items to download.
Create the relevant cURL command, REST API client request body example, or Python script. In this example, we are using a stand-in address for a Cybereason server (myserver.com). If you use this request, replace this address with your actual server address.
All Python examples are formatted for Python version 3.0 and higher, up to the latest Python version. If you are using versions of Python earlier than 3.0, ensure you manually remove parentheses for the print statements in this sample. For example, the print (response.content) statement updates to print response.content.
curl --request POST \
  --url https://myserver.com/rest/fetchfile/start \
  --header 'Content-Type: application/json' \
  --data '{
                    "elementGuids":["<element GUID>"],
            "initiatorUserName":"<user name>"
          }'
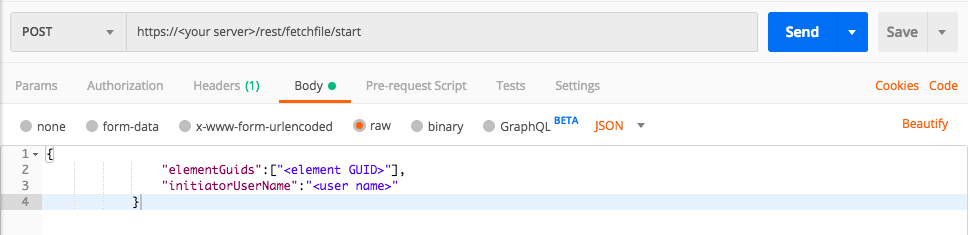
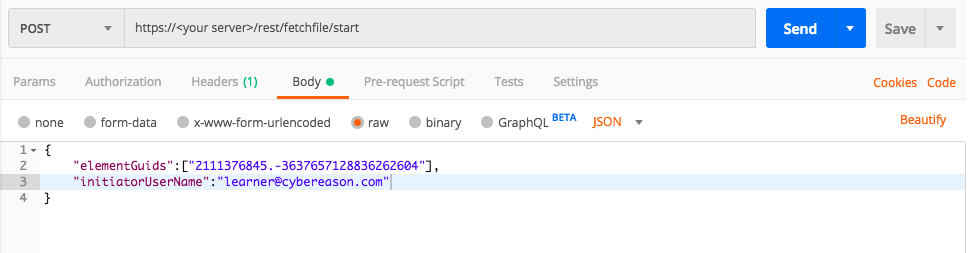
Use this request body:
Depending on your browser settings, this linked file may open in a separate tab instead of downloading directly to your machine. If this happens, use the Save As option in your browser to save the file locally.
Use this request body:
{
              	"elementGuids":["<element GUID>"],
                "initiatorUserName":"<user name>"
            }
Depending on your browser settings, this linked file may open in a separate tab instead of downloading directly to your machine. If this happens, use the Save As option in your browser to save the file locally.
import json
import requests

username = "<user name>"
password = "<password>"
server = "yourserver.com"
port = "443"

data = {
			"username": username,
			"password": password
		}

headers = {"Content-Type": "application/json"}

base_url = "https://" + server + ":" + port

login_url = base_url + "/login.html"

session = requests.session()

login_response = session.post(login_url, data=data, verify=True)

print (login_response.status_code)
print (session.cookies.items())

# Request URL

endpoint_url_1 = "rest/fetchfile/start"

api_url_1 = base_url + endpoint_url_1

# These are the variables that represent different fields in the request.

element_id = "<file GUID>"

query = json.dumps({"elementGuids":[element_id],"initiatorUserName":username})

api_headers = {'Content-Type':'application/json'}

api_response = session.request("POST", api_url_1, data=query, headers=api_headers)

your_response = json.loads(api_response.content)

print(json.dumps(your_response, indent=4, sort_keys=True))
Step 3: Run the first request and evaluate the response
In the command line, REST API client, or IDE, run the command or script containing the request. The response returns details on the success of the request:
{
  "data":true,
  "status":"SUCCESS",
  "message":""
}
Ensure the status field returns SUCCESS. If it does not, you should investigate what is happening on your server to see why the file will not download.
Step 4: Build the request to get the download batch number
After you have started the download operation, run another request to get the batch number for the download operation. You will run a third request using this batch number to actually download the file.
Create the relevant cURL command, REST API client request body example, or Python script. In this example, we are using a stand-in address for a Cybereason server (myserver.com). If you use this request, replace this address with your actual server address.
All Python examples are formatted for Python version 3.0 and higher, up to the latest Python version. If you are using versions of Python earlier than 3.0, ensure you manually remove parentheses for the print statements in this sample. For example, the print (response.content) statement updates to print response.content.
curl --request GET \
  --url https://myserver.com/rest/fetchfile/downloads/progress \
  --header 'Content-Type: application/json' \
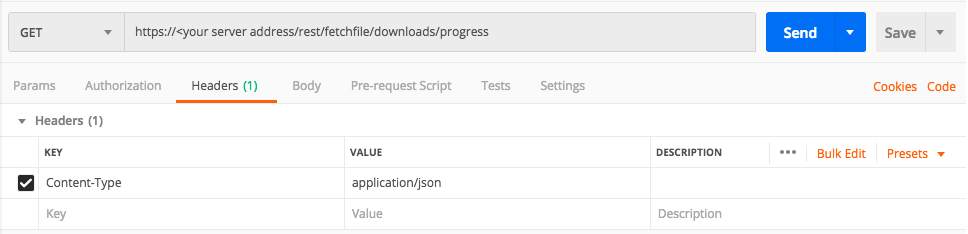
Use this request body:
Note
The code in this sample is repeated in the third sample below. You do not need to run the script now but it is used here to help you understand how you build the request.
Depending on your browser settings, this linked file may open in a separate tab instead of downloading directly to your machine. If this happens, use the Save As option in your browser to save the file locally.
import json
import requests

username = "<user name>"
password = "<password>"
server = "yourserver.com"
port = "443"

data = {
			"username": username,
			"password": password
		}

headers = {"Content-Type": "application/json"}

base_url = "https://" + server + ":" + port

login_url = base_url + "/login.html"

session = requests.session()

login_response = session.post(login_url, data=data, verify=True)

print (login_response.status_code)
print (session.cookies.items())

# Request URL

endpoint_url_2 = "fetchfile/downloads/progress"

api_url_2 = base_url + endpoint_url_2

api_headers = {'Content-Type':'application/json'}

api_response = session.request("GET", api_url_2, headers=api_headers)

your_response = json.loads(api_response.content)

print(json.dumps(your_response, indent=4, sort_keys=True))
Step 5: Run the second request and evaluate the response
In the command line, REST API client, or IDE, run the command or script containing the request.
The response contains a large amount of data. However, the key field in the response is the batchId field. You need this number to actually download the file.
  {
              "data":[
                      {
                        "@class":"com.cybereason.commads.FetchFileActionProgress",
                        "batchId":675769080,
                        "actionType":"FetchFile",
                        "initiatorUserName":"[email protected]",
                        "sizeInBytes":477696,
                        "fileName":"powershell.exe",
                        "machineName":"desktop-vpg2hip",
                        "hash":"1d7634765bcf3050d6272cba514bdb1495bad329",
                        "startTime":1576697965843,
                        "actionStatus":"NONE",
                        "timeout":false,
                        "pending":false,
                        "inProgress":false,
                        "failed":true,
                        "succeeded":false
                      }
                     ]
}
Step 6: Build the request to download the file
With the batch ID number, you can now download the file to your machine. Create the relevant cURL command, REST API client request body example, or Python script. In this example, we are using a stand-in address for a Cybereason server (myserver.com). If you use this request, replace this address with your actual server address.
All Python examples are formatted for Python version 3.0 and higher, up to the latest Python version. If you are using versions of Python earlier than 3.0, ensure you manually remove parentheses for the print statements in this sample. For example, the print (response.content) statement updates to print response.content.
curl --request GET \
  --url https://myserver.com/rest/fetchfile/getfiles/:batchId \
  --header 'Content-Type: application/json' \
Use this request body:
Depending on your browser settings, this linked file may open in a separate tab instead of downloading directly to your machine. If this happens, use the Save As option in your browser to save the file locally.
import json
import requests
import os
import sys
import zipfile
import io

username = "<user name>"
password = "<password>"
server = "yourserver.com"
port = "443"

data = {
			"username": username,
			"password": password
		}

headers = {"Content-Type": "application/json"}

base_url = "https://" + server + ":" + port

login_url = base_url + "/login.html"

session = requests.session()

login_response = session.post(login_url, data=data, verify=True)

print (login_response.status_code)
print (session.cookies.items())

# Request URL to start the file download operation

endpoint_url_1 = "rest/fetchfile/start"

api_url_1 = base_url + endpoint_url_1

# These are the variables that represent different fields in the first request.

element_id = "<file GUID>"

query = json.dumps({"elementGuids":[element_id],"initiatorUserName":username})

api_response_1 = session.request("POST", api_url_1, data=query, headers=headers)

your_response = json.loads(api_response.content_1)

# Request URL

endpoint_url_2 = "fetchfile/downloads/progress"

api_url_2 = base_url + endpoint_url_2

api_response_2 = session.request("GET", api_url_2, headers=headers)

your_response_2 = json.loads(api_response_2.content)

batch_id = your_response_2['batchId']

print (batch_id)

# Request URL to download the file

endpoint_url_3 = "fetchfile/getfiles/"

api_url_3 = base_url + endpoint_url + "batch_id"

api_response_3 = session.request("GET", api_url_3, headers=headers)

cwd = os.getcwd()
outputDir = cwd + "\\filedownloads"

download = zipfile.ZipFile(io.BytesIO(api_response_3.content))
download.extractall(outputDir)
Step 7: Run the final request and evaluate the response
Similiar to the request to start the download operation, you will receive a status message in the response.
{
  "data":true,
  "status":"SUCCESS",
  "message":""
}
Ensure that the status field reports SUCCESS. In addition, the file will download to your default downloads folder in a .zip file. Inside the zip file are instructions on how to open the downloaded file.